Window screens are often overlooked when it comes to home maintenance, yet they play a crucial role in keeping your indoor environment clean and comfortable. Dirty screens can diminish your view, make your home look unkempt, and even allow dirt and allergens to enter. Knowing how to properly clean your window screens will not only keep them visually appealing but will also extend their lifespan. In this detailed guide, we will cover everything you need to know about cleaning window screens, including the tools needed, step-by-step instructions, and maintenance tips for keeping your screens clear and functional.
Before diving into the cleaning process, let’s explore why maintaining clean window screens is essential:
Dirty screens can trap dust, pollen, and other allergens, which can affect indoor air quality. Regular cleaning helps reduce these irritants, promoting a healthier living environment.
Over time, dirt and debris can accumulate on window screens, obstructing your view of the outdoors. Cleaning your screens ensures unobstructed views and better natural light in your home.
Routine maintenance can help prevent wear and tear on your window screens. Neglecting them can lead to damage, requiring costly replacements.
Clean window screens contribute to the overall appearance of your home. They complement clean windows and enhance curb appeal.

Before you begin the cleaning process, gather the necessary tools and materials. Here’s what you’ll need:
A soft-bristled brush is essential for gently removing dirt and dust from the surface of the screens.
Using a vacuum cleaner with a brush attachment can help lift and remove loose dirt and debris more efficiently.
You can use a store-bought gentle detergent or create a homemade cleaning solution. A mixture of water and a few drops of dish soap works well.
A bucket will be needed for mixing your cleaning solution if you opt for a homemade mix.
A spray bottle can make applying your cleaning solution easier and more controlled.
You'll need a soft, lint-free cloth or sponge to wipe down the screens after scrubbing.
If you have removable screens and access to an outdoor space, a water hose can make rinsing faster and easier.
Protect your hands by wearing rubber or latex gloves, especially if you are using cleaning solutions.
Now that you have your tools ready, let’s go through the step-by-step process of cleaning your window screens.
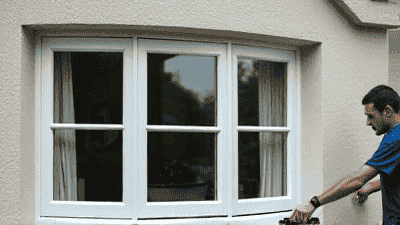
The first step in cleaning window screens is to carefully remove them from your windows. Here’s how to do it:
Take Safety Precautions: Before removing screens, ensure you have a stable footing. If the screens are high up, consider using a sturdy ladder.
Check for Fasteners: Depending on the type of window screens you have, check for any fasteners or latches that need to be released before removing the screen. Gently slide or lift the screen out of the frame.
Handle with Care: Be cautious while handling the screens to avoid bending or damaging them.
Once you have your screens removed, take them outside (if possible) to shake off loose dirt and debris. This step will make the subsequent cleaning process easier.
Shake Gently: Hold the screen by its edges and give it a gentle shake to dislodge any loose dirt or dust.
Tap Gently: For stubborn debris, lightly tap the screen against a hard surface or use a soft brush to remove any lingering particles.
Next, use a vacuum cleaner with a brush attachment to thoroughly clean the screens.
Position the Vacuum: Hold the screen vertically and use the brush attachment to vacuum both sides of the screen. Start from the top and work your way down, ensuring you cover the entire surface.
Focus on Corners and Edges: Pay special attention to the corners and edges where dirt tends to accumulate.
Now it’s time to mix your cleaning solution.
Choose Your Cleaning Solution: If you’re using a store-bought cleaner, follow the instructions on the label. For a homemade solution, mix warm water with a few drops of dish soap in a bucket.
Transfer to a Spray Bottle: If you prefer, pour the cleaning solution into a spray bottle for easy application.
With your solution ready, it’s time to start cleaning the screens.
Spray the Solution: Generously spray the cleaning solution onto both sides of the screen, ensuring the surface is evenly coated. If using a bucket, you can dip a soft cloth or sponge into the cleaning solution and apply it manually.
Let it Sit: Allow the solution to sit for a minute or two to break down any grime and dirt.
After letting the solution sit, it’s time to scrub away the dirt.
Use a Soft Brush or Cloth: Using a soft-bristled brush or a lint-free cloth, gently scrub both sides of the screen. Avoid using harsh brushes, as they can damage the screen material.
Be Gentle: Focus on areas with stubborn grime or marks, but be careful not to exert too much pressure.
Once you’ve finished scrubbing, it’s crucial to rinse the screens thoroughly.
Using a Hose: If you have access to a garden hose, take the screens outside and rinse them with water to remove any soap residue. Spray from the top down to ensure thorough rinsing.
Using a Damp Cloth: If you can't use a hose, rinse with a damp cloth instead. Wipe down the screens with clean water, being careful to remove all cleaning solutions.
After rinsing, it’s important to allow the screens to dry completely before reinstalling them.
Air Dry: Prop the screens upright in a shady area to air dry. This prevents water spots and allows for thorough drying.
Avoid Direct Sunlight: Avoid drying in direct sunlight, as it can warp or damage the screen material.
Once the screens are completely dry, reinstall them back into their frames.
Carefully Position Screen: Align the screen with the window frame and gently slide it back into place, ensuring it is securely fitted and stable.
Check Secure Fastening: If there are fasteners or latches, make sure to reattach them to keep the screens securely in position.
After reinstalling, conduct a final inspection of the screens and surrounding areas.
Check for Dust: Look for any lingering dust or particles that may have settled during the cleaning process.
Ensure Accessory Functionality: Check the operation of windows and screens to ensure they function properly after being cleaned.

Now that you know how to clean your window screens, let’s discuss some maintenance tips to keep them clean and in good condition year-round.
Establish a routine cleaning schedule each season or as needed. Depending on your environment, consider cleaning your window screens every three to six months.
When the weather permits, keep your windows closed to minimize the accumulation of dust and debris on the screens.
Using air purifiers in your home can help reduce airborne allergens and dust that can accumulate on screens.
If you or guests smoke indoors, this can lead to residue buildup on screens. Encourage outdoor smoking to reduce the need for frequent cleanings.
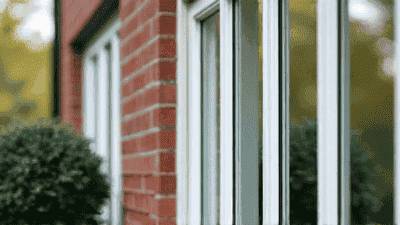
Trim any nearby trees or bushes that might cause leaves and debris to gather on your screens. Keeping vegetation away from windows can help maintain cleaner screens.
Regularly check your screens for signs of damage, such as tears or holes. Repair or replace any damaged screens promptly to maintain their effectiveness.
Consider investing in high-quality, durable screens that are resistant to wear and damage. This choice can make cleaning easier and prolong the life of your screens.
Despite your best efforts, issues can arise during the cleaning process. Here are solutions for common problems:
If you encounter tough stains that won’t come out with mild soap, consider using a specialized cleaner formulated for window screens. Always test in an inconspicuous area first to ensure it does not damage the material.
If your screens have tears or holes, repair them using screen repair kits available at hardware stores. For extensive damage, it may be more effective to replace the screen entirely.
If removing the screens seems too challenging, look for any latches or fasteners you might have missed. For particularly large or heavy screens, consider enlisting help to avoid injury.

Cleaning your window screens is an essential part of home maintenance that should not be overlooked. With the right tools and techniques, you can efficiently clean your screens, ensuring they remain effective at keeping your indoor environment free of dust and allergens. By following this comprehensive step-by-step guide, you’ll be able to enjoy clear views and fresh air all year round.
Remember that routine maintenance and occasional deep cleaning sessions are vital for extending the life of your screens. Keeping them clean not only enhances your home’s appearance but also contributes to a healthier living space. With a little effort, you can keep your window screens looking great and performing well, ensuring your home remains a comfortable and welcoming environment.